Showing posts with label designing. Show all posts

Sunday, 29 April 2012

An Exercise In Patience


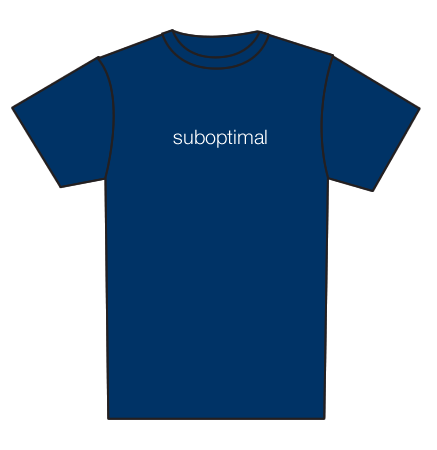
The company I work for is obsessed with t-shirts, to the point that one of our customers once joked that we were a t-shirt company masquerading as a software company. Most of the shirts we get made are fairly elaborate and designed in-house for special occasions, but one of our lovely designers decided to draw up unofficial plain text-based ones of memorable things people had said around the office. I really liked the designs, so for Christmas last year I asked her partner which ones they each liked the best, and took a crack at making them.

The original shirt designs - courtesy of @samthebridge

Luckily I found a couple of plain t-shirts at Giordano (although they didn't have a dark blue male one so I had to settle for green), then I wandered off to Lincraft to find t-shirt transfers. There were two types - for white and coloured backgrounds - so I grabbed a pack of the coloured ones.


I started out by printing out a couple of draft versions of the text to get the sizing right. It turned out that choosing the colour was also somewhat difficult - at first I thought a really light grey would be good, but when I tried it out it was too dark. Light cream ended up looking a bit closer to white so I just went with that.

Experimenting with colour and positon

When I bought the transfers, I had assumed that the coloured background type would be a clear sheet that you just printed your design on to and then could cut around roughly and iron on the shirts. To my horror, when I opened the packet the whole sheet was opaque white! I have no idea why they were for 'coloured backgrounds', but it left me with no choice but to cut out all the letters individually.


Oh. My. Goodness. In general I'm not a patient person but I usually get a bit pedantic with getting craft projects perfect. This was really pushing it though. I think all up for the two shirts I was cutting up letters for at least 2 or 3 hours - at least I can say I have excellent cutting skills now. The worst part was the letters like 'e' and 'b' that had bits that needed the middle cut out, and the one 's' I had to cut out was terrible. Whenever I hit an 'l' or a capital 'i' I was over the moon.

I'm about the same size as Sam, and I'd bought myself a shirt along with the two presents I'd gotten, so I was able to position the text in the right place by trying on my shirt with the draft copies I'd made earlier. I just sort've guessed for the other one!


I had a bit of a mishap with the green one - I stuck some paper over the letters and ironed them like the instructions said, but I didn't read all the instructions properly and took the paper off too early (it has to cool down before you peel it off, oops!). Some of the letters came off, so I just grabbed the practice copies of the letters and used them as stencils directly against the t-shirt transfer. It meant that some letters were cream and some were actually white, but given that the shirt said 'Suboptimal', it sort've made sense! I'm glad I did it first though - if I had done the blue one first and lots of letters had been ruined I would've cried.


I'm actually really happy with how they turned out. The edges of the lettering aren't quite perfect and some of them came out a bit wonky but it made the t-shirts feel a bit more personal than if it'd just been printed out by a machine. Plus, while the letters were a huge pain to cut out, not having large expanses of clear t-shirt transfer stuck to the shirt was awesome. As a finishing touch I put our company's logo on the back of the shirts where it appears on our official shirts - it was much easier to cut out than the letters were!


Thursday, 26 April 2012

Under Construction


Now that I have my shiny new sewing machine, I'm going to say a fond but relieved farewell to my mum's old machine by sharing with you the last project I made with it. Fittingly enough, it ended up being a Christmas present for my mum.

I've been toying with the idea of making a shoulder bag for a while - I figured the basic construction of it would be the same as a lined pouch, just with an open top and shoulder straps. I wanted to put up a pattern and tutorial, but in my last-minute rush (I started making it at 11am on Christmas morning!) I sort've ran out of time to take photos. I'll share what I have though.

The main difficulty was with the straps. To make a lined item, you sew it inside-out and then flip it round at the end. Figuring out how to sew the straps on so they'd actually be in the right place after flipping it took a lot of thinking about. I eventually worked it out - you sew them on upside down in between the lining and the outside of the bag.

Sewing the strap to the lining - the outside panels got sewn on top of this

I was also worried that the straps wouldn't be able to hold the weight of the bag. In the end I copied some of the green canvas grocery bags I had in the house and attached them with a cross pattern. Then I stitched over the crosses about 3 times for good measure.

Marking out the strap attachment

I lined the underside of the straps, too. Before attaching them to the bag I just sewed the lining and the outside material together along the long sides and the bottom, then turned them inside out. Because they were long and thin it took some coaxing with a ruler, and at times they looked somewhat inappropriate...

After the straps were on, the rest of the process was pretty straightforward. The bag itself came out really nicely - I like how the leaves are only at the bottom of it so they look like they're growing up towards the top. Mum uses it as a toiletries bag now though, so maybe I should've lined it with plastic!


Sunday, 23 October 2011

Starting from Scratch


I don't actually remember when I learnt how to knit, or who taught me. I know, though, that the first thing I learnt to make were padded hangers - I thought they were pretty daggy, but Steph loved them so I kept making them for her as presents. I love them now too and I have quite a few in my wardrobe. They're ridiculously simple to knit, you just make a rectangle out of plain knit stitches, and the rest is in the sewing.

One of the hangers from my wardrobe
After knitting a lot of hangers, I remember that when my Mum first taught me how to purl it was a revelation. I noticed fairly early on that there was a difference between knitted and purled material, but no one ever sat me down and properly taught me the difference between garter and stockinette stitch. There's a scarf in my drawer from early high school (when I was 12 or so) that's made up in basketweave stitch, and I remember being so proud of myself because I figured out the pattern on my own.

My basketweave scarf
Since then I haven't really come up with anything on my own. I've taught myself (with lots of help from the internet!) how to do various increases and decreases, and I can alter a pattern, but I haven't ever just taken a ball of wool and some needles and winged it on anything more complicated than a rectangle. Part of the problem is that I absolutely hate ripping things out - it seems like such a waste of time and effort - so I knew if I ever wanted to start getting creative it would have to be something small.

When Zara opened in Sydney the lines were so ridiculous that Steph and I didn't venture in until a couple of weeks after it opened. All the good stock was pretty much gone (apparently on opening day 80% of the stock was gone in about 3 minutes!), but I picked up a nice top that was fairly plain except for the knitted bow that was sitting on it. It didn't occur to me straight away, but I realised the other day that it was nice and small and pretty simple to knit, so would make for an excellent first experimental project.

The knitted bow off my Zara top
Digging into my bag of scrap wool ended up being rather profitable - I found some merino from a hat I'd made for a cousin. There was a lot left over because she's eleven and her head is small, but being for an eleven year old girl, the wool was bright pink. It was lovely and soft though, so I went with it. The bow looked pretty easy to make - it just involved a main cylindrical part, and a smaller knitted loop to gather it in the centre. The main bit was going to be easy, but I (like most knitters, I think) hate sewing up seams, so I knitted it in the round. In retrospect it was so small that it probably would've been easier to just sew the side seam up!


Knitting in the round
The finished main tube

Once that part was done, it was just the little middle bit to do. Strangely enough, that was the part that caused the most trouble. Initially I made it way too big and it didn't gather the middle up well at all. It just sort of sat there loosely. I ended up finally biting the bullet and just ripping the whole middle out and starting again. It was actually somewhat liberating, although it still felt like a bit of a waste. I made it smaller, and it was still too big. It turns out that knitted material is much stretchier than I thought. I ended up making it comically small and just shoving the main part through it, and it came up nicely!


I stuck it on a bobby pin and I've worn it to work a couple of times. The pinkness of it makes me feel like I'm about 5, so I might try it again in a different colour. I'm really liking the pattern, especially since there's so many different things I can probably do with it - headbands, pins, decoration on clothing - so I might experiment with it a bit more and make them in different sizes to see what I can come up with :)