Sunday 29 April 2012

An Exercise In Patience


The company I work for is obsessed with t-shirts, to the point that one of our customers once joked that we were a t-shirt company masquerading as a software company. Most of the shirts we get made are fairly elaborate and designed in-house for special occasions, but one of our lovely designers decided to draw up unofficial plain text-based ones of memorable things people had said around the office. I really liked the designs, so for Christmas last year I asked her partner which ones they each liked the best, and took a crack at making them.

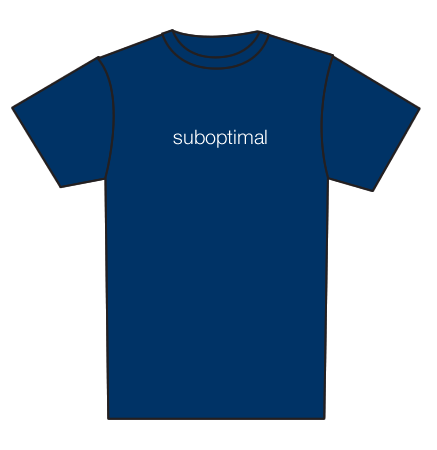
The original shirt designs - courtesy of @samthebridge

Luckily I found a couple of plain t-shirts at Giordano (although they didn't have a dark blue male one so I had to settle for green), then I wandered off to Lincraft to find t-shirt transfers. There were two types - for white and coloured backgrounds - so I grabbed a pack of the coloured ones.


I started out by printing out a couple of draft versions of the text to get the sizing right. It turned out that choosing the colour was also somewhat difficult - at first I thought a really light grey would be good, but when I tried it out it was too dark. Light cream ended up looking a bit closer to white so I just went with that.

Experimenting with colour and positon

When I bought the transfers, I had assumed that the coloured background type would be a clear sheet that you just printed your design on to and then could cut around roughly and iron on the shirts. To my horror, when I opened the packet the whole sheet was opaque white! I have no idea why they were for 'coloured backgrounds', but it left me with no choice but to cut out all the letters individually.


Oh. My. Goodness. In general I'm not a patient person but I usually get a bit pedantic with getting craft projects perfect. This was really pushing it though. I think all up for the two shirts I was cutting up letters for at least 2 or 3 hours - at least I can say I have excellent cutting skills now. The worst part was the letters like 'e' and 'b' that had bits that needed the middle cut out, and the one 's' I had to cut out was terrible. Whenever I hit an 'l' or a capital 'i' I was over the moon.

I'm about the same size as Sam, and I'd bought myself a shirt along with the two presents I'd gotten, so I was able to position the text in the right place by trying on my shirt with the draft copies I'd made earlier. I just sort've guessed for the other one!


I had a bit of a mishap with the green one - I stuck some paper over the letters and ironed them like the instructions said, but I didn't read all the instructions properly and took the paper off too early (it has to cool down before you peel it off, oops!). Some of the letters came off, so I just grabbed the practice copies of the letters and used them as stencils directly against the t-shirt transfer. It meant that some letters were cream and some were actually white, but given that the shirt said 'Suboptimal', it sort've made sense! I'm glad I did it first though - if I had done the blue one first and lots of letters had been ruined I would've cried.


I'm actually really happy with how they turned out. The edges of the lettering aren't quite perfect and some of them came out a bit wonky but it made the t-shirts feel a bit more personal than if it'd just been printed out by a machine. Plus, while the letters were a huge pain to cut out, not having large expanses of clear t-shirt transfer stuck to the shirt was awesome. As a finishing touch I put our company's logo on the back of the shirts where it appears on our official shirts - it was much easier to cut out than the letters were!


Thursday 26 April 2012

Under Construction


Now that I have my shiny new sewing machine, I'm going to say a fond but relieved farewell to my mum's old machine by sharing with you the last project I made with it. Fittingly enough, it ended up being a Christmas present for my mum.

I've been toying with the idea of making a shoulder bag for a while - I figured the basic construction of it would be the same as a lined pouch, just with an open top and shoulder straps. I wanted to put up a pattern and tutorial, but in my last-minute rush (I started making it at 11am on Christmas morning!) I sort've ran out of time to take photos. I'll share what I have though.

The main difficulty was with the straps. To make a lined item, you sew it inside-out and then flip it round at the end. Figuring out how to sew the straps on so they'd actually be in the right place after flipping it took a lot of thinking about. I eventually worked it out - you sew them on upside down in between the lining and the outside of the bag.

Sewing the strap to the lining - the outside panels got sewn on top of this

I was also worried that the straps wouldn't be able to hold the weight of the bag. In the end I copied some of the green canvas grocery bags I had in the house and attached them with a cross pattern. Then I stitched over the crosses about 3 times for good measure.

Marking out the strap attachment

I lined the underside of the straps, too. Before attaching them to the bag I just sewed the lining and the outside material together along the long sides and the bottom, then turned them inside out. Because they were long and thin it took some coaxing with a ruler, and at times they looked somewhat inappropriate...

After the straps were on, the rest of the process was pretty straightforward. The bag itself came out really nicely - I like how the leaves are only at the bottom of it so they look like they're growing up towards the top. Mum uses it as a toiletries bag now though, so maybe I should've lined it with plastic!


Sunday 22 April 2012

With A Little Help From My Friends


I've been blessed to have the most amazing people in my life, and their support of my hobbies has been beyond belief (having a conversation with someone who's sitting there knitting must be a somewhat off-putting experience). As I've said before, my family's always put a lot of importance on presents, so with Christmas in December and my birthday in February the new year always sees me with a lot of new stuff. This year was no exception - amongst some pretty accessories and clothes (thanks Steph!) I ended up with some awesome craft-related presents.

For my birthday, my lovely friend and soon-to-be housemate got me a new knitting book. I always find pattern books a bit hit and miss but this is more of an encylopedia than anything, and it has a stitch dictionary at the back full of cable and lace patterns that I'm just itching to try out.


I love knitting in the round. I can't stand sewing at the end of a knitting project, and circular needles mean that you just don't have to seam a sleeve or two. The only problem is that every project seems to call for a different sized needle with a different length of cable, and buying all the different combinations individually has ended up being somewhat expensive. My parents got me an interchangeable knitting set - it's from Knit Pro, and it's brilliant. There are eight different sized needles that screw on to four different lengths of cable, so effectively it's stopping me from having to buy 32 different sets of needles!


Last but definitely not least, Nick got me a new sewing machine. I can't actually express how excited I was. Up until now I've been using my mum's old one which has been a bit unreliable. My machine's from Singer, but I'm not giving a link to it because I'm too scared to Google it - my mum took one look at it and went "that looks expensive!". It's so awesome to not have to stop and unpick mistakes that the machine's made, and it has a whole range of stitches. My favourite one so far has been the overlocking stitch - it makes edges look overlocked without actually needing an overlocker.

New machine!

Up close and personal
The huge range of fancy stitches
I haven't been blogging much because I've been playing with my new toys, but keep your eyes peeled for some new posts soon!