Showing posts with label sewing. Show all posts

Sunday, 29 December 2013

Cushiony Goodness

Hello girls and boys, I'm back! It's been a long while since I made anything - life got in the way! - but I've started up again recently so I figured I'd share.

The recent flurry of making really started because I moved house. Two things happened - firstly, I finally managed to give my sewing machine its own little permanent corner of my room. I headed off to Ikea and bought a desk and a pretty chair, and the desk is just the right size to keep my machine and material stash in it.


Tuesday, 19 June 2012

Seeing Spots


I've always envied people who can sew their own clothes. The idea that you can have clothes that fit you exactly and look just like what you want is ridiculously appealing to me. When I first got my sewing machine, I had a crafty night with my friend G and I watched in awe as she sat down with an old pair of jeans, some patchwork material and a pair of scissors and just whipped up a skirt. I've been looking for a longish black and white skirt for a while and haven't been able to find one (why is everything mini-skirt length these days?), so I decided to try making one.


Wednesday, 2 May 2012

Unmentionables


After being so excited at receiving my lovely sewing machine for Christmas, I suddenly got caught up with a few knitting projects. Mid March I realised that I'd had it for 3 months, I hadn't sewn anything yet, and I actually really missed it. So in a fit of (hopefully temporary) madness I upended my fabric collection onto my living room floor.

At the end of the night, I ended up with a very messy living room floor, and half a drawstring bag.

My lovely mess. Yes, that's a bottle of shampoo in the background.
For a bit of backstory, Steph asked me a while ago for a small laundry bag with a picture of lingerie on the front that she can use when she's travelling. I figured it'd be nice to have a plain bag with the detail on the front matching the lining. The fabric I'd picked up from the Fabric-a-brac late last year seemed to be just the right size and sort of pattern, so it all worked out pretty well.

Matching lining!
Usually I just dive straight in to these things but I'm glad I actually stopped and had a think first this time round. I ended up cutting out stencils of the underwear before I cut the material, and it's a good thing I did because it took a couple of goes to get the sizing of the undies right compared to the bag.

Sewing the design onto the front of the bag was actually surprisingly doable thanks to the new machine - it has a setting that my old one didn't have that lets you sew small things a lot more easily. I didn't want to fiddle with folding the edges under, so I ironed some interfacing onto the back so it wouldn't fray and just sewed close to the edges of the shapes.

It ended up taking me a few nights and a bit of thinking (making the loop for the drawstring to go through took some thought!) but it was pretty fun to make in the end. In hindsight if I were to make it again I'd probably make it out of thinner material so it'd be easier to wash. I'm pretty sure Steph likes it, though, which is probably the most important thing :)


Thursday, 26 April 2012

Under Construction


Now that I have my shiny new sewing machine, I'm going to say a fond but relieved farewell to my mum's old machine by sharing with you the last project I made with it. Fittingly enough, it ended up being a Christmas present for my mum.

I've been toying with the idea of making a shoulder bag for a while - I figured the basic construction of it would be the same as a lined pouch, just with an open top and shoulder straps. I wanted to put up a pattern and tutorial, but in my last-minute rush (I started making it at 11am on Christmas morning!) I sort've ran out of time to take photos. I'll share what I have though.

The main difficulty was with the straps. To make a lined item, you sew it inside-out and then flip it round at the end. Figuring out how to sew the straps on so they'd actually be in the right place after flipping it took a lot of thinking about. I eventually worked it out - you sew them on upside down in between the lining and the outside of the bag.

Sewing the strap to the lining - the outside panels got sewn on top of this

I was also worried that the straps wouldn't be able to hold the weight of the bag. In the end I copied some of the green canvas grocery bags I had in the house and attached them with a cross pattern. Then I stitched over the crosses about 3 times for good measure.

Marking out the strap attachment

I lined the underside of the straps, too. Before attaching them to the bag I just sewed the lining and the outside material together along the long sides and the bottom, then turned them inside out. Because they were long and thin it took some coaxing with a ruler, and at times they looked somewhat inappropriate...

After the straps were on, the rest of the process was pretty straightforward. The bag itself came out really nicely - I like how the leaves are only at the bottom of it so they look like they're growing up towards the top. Mum uses it as a toiletries bag now though, so maybe I should've lined it with plastic!


Thursday, 8 March 2012

Small Shopping Sprees

I've never been into online shopping. I'm happy to buy things like concert tickets, but in general I'm pretty fussy so I don't like purchasing things unless I can see or feel them first. It's something I'm definitely trying to get over though. I want to get more involved in the general crafty community and support other people who make handmade things, and a lot of it seems to be online.

A while ago I came across an Australian site called Madeit through an unexpected source. Canteen are an amazing organisation that provide relief opportunities for kids living with cancer (go check them out and support them if you can). Their main fundraising event every year is Bandana Day, when they get volunteers to sell bandanas on the street for them. I've bought one every year since late high school, and my stash currently looks like this:


Two years ago I volunteered to be a seller. In the information package they sent me there was a flyer for Madeit and a suggestion to sew some bandanas into something and sell it. It seems that, like me, a lot of their sellers have a bandana overload!

I never did buy anything off Madeit, but their sister shop Craftumi is excellent. Craftumi sells supplies, and I can't find anything bad to say about it. Since it's local, orders ship really quickly, and a lot of the shops let you do direct bank deposits. Also, since it follows the model of having individual shops with vendors you deal with directly, communication about the status of your order is really good. A few fabrics from the Oli-store are from there: the Owls and the Deer came from Fabric Pixie, while HedgeHog Meadow came from DesignerFabricInOz.

I made a purchase more recently from Spoonflower, who I'd heard about a year ago from one of my friends. Spoonflower's an awesome idea - designers and artists can upload images that get printed as fabric. There's a huge number of designs on the site, and when I first visited a year ago I'd already found a lovely ladybug pattern I fell in love with.

I'd never gotten around to buying it mainly because the prices just seem to high. But late last November, I found out that they were having a two for one sale on fat quarters and I went nuts. I ended up buying the ladybugs along with 5 other lots of material from various shops. My favourite is (rather predictably) an elephant pattern. I made a pouch out of the ladybugs but haven't had a chance to make anything with the elephants yet - what should I make?

Elephant March by Endemic

The prime candidate for a shopping spree of this sort seems to be Etsy, but I just haven't managed to find that many things that I've fallen in love with yet. When I finally did make a purchase a couple of months ago it was only for some zippers for my pouches - not particularly exciting. I have had my eye on a particularly pretty nightgown for a while, but Steph got me one for my birthday so I'll have to have a think.
Bon Bon sleepwear by Sandmaiden
Where do you like to shop? Do you know any good handmade shops that sell online? Any recommendations would be awesome :)

Monday, 20 February 2012

All Puffed Up

A short while after I started sewing up pouches I started toying with the idea of adding things to them. One of the early successful experiments was the protective plastic, and I've made and sold about equal numbers of the normal and PVC coated versions. Aside from wanting to protect the fabric of the pouch itself, though, I've been wondering how to protect the things inside it for a while.

Padding is an odd concept to work with. Most protective cases I've had for electronics have been quite stiff and made of leather or plastic, but about a year or so ago when I needed a new camera case, it seemed a shame not to use some of the lovely brightly coloured material I had lying around.

Sorry about the picture quality - having my camera in the shot meant taking the photo on my phone!

The only padding I've ever really worked with has been for the padded hangers I make. It's pretty thick, and comes in big rolled up sheets. I'm not even entirely sure what it's called. I think the actual term for it is wadding. It seemed fluffy enough to protect my camera, so I started sewing a new pouch, and halfway through the process stuffed some of the wadding in between the lining and the outside. It came out ridiculously puffy. I figured I'd iron it, but that turned out to be a bit of a mistake when the whole padded inside shrunk! It's still very lightly padded though and seems to have protected my camera well enough for the last year.

One of my friends saw the padded case, and asked me if I could make one for her. This time, instead of stuffing the padding in between the layers, I actually sewed it in around the edges with the lining. I also didn't iron it, so it came out much puffier.


Aside from the fact that I picked a bit too small a zipper for the pouch, I quite like how it turned out. Working with new materials is always challenging but when it works out it's really rewarding. When my friend originally saw my camera case, I had only just picked up the fabric (My Little Helpers from Spellstone on Spoonflower) from the Post Office. Also, I only managed to sew the padding into the lining because I had a brand new sewing machine - my old one couldn't have handled it. I'm actually really excited about the new machine but it's getting late here in Sydney so I'll have to tell you the stories behind it and the new fabric another day!

Saturday, 28 January 2012

Such Sweet Sorrow

Selling handmade items is a strange exercise. You invest so much of yourself, your time and your effort into making something useful and beautiful, but then you go ahead and give it away. I've been lucky in that everything I've sold has been something that I already own myself. Friends will see something I have, or that I'm wearing, and will ask me to make them a copy. This has meant that I've never really experienced separation anxiety when I deliver people's orders - until recently, that is.

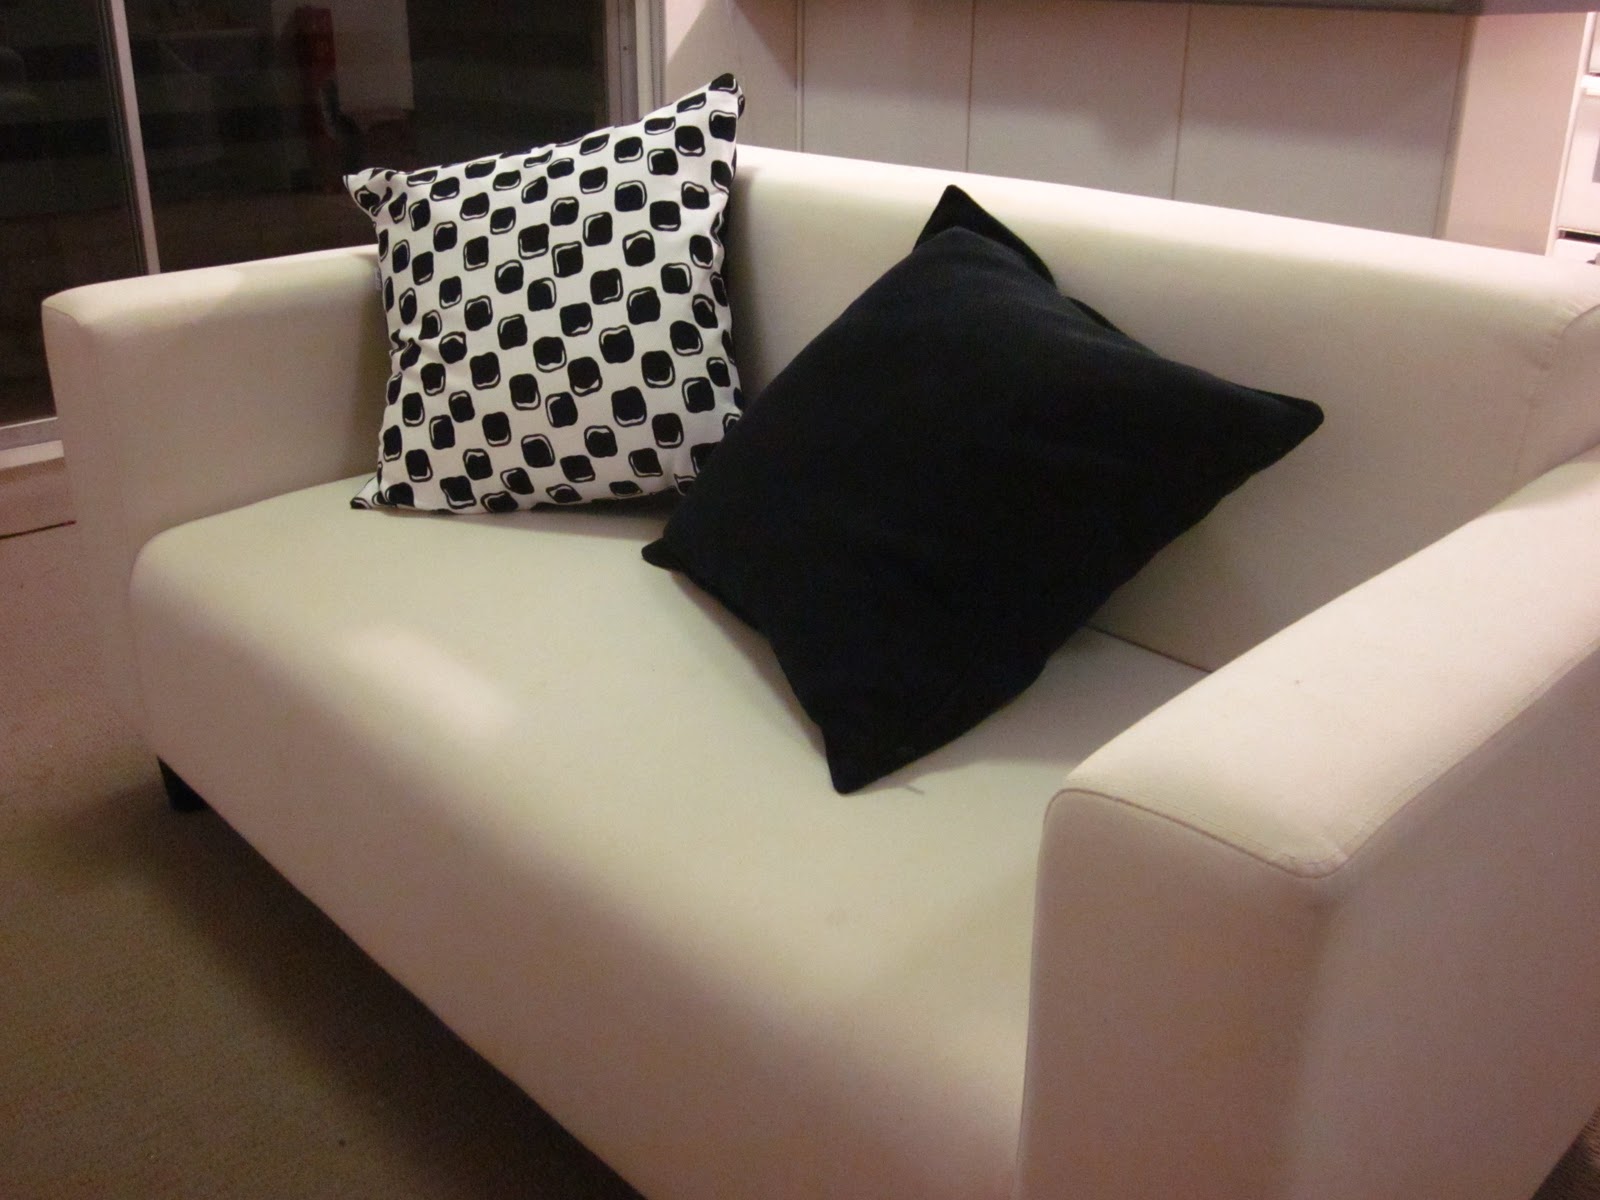
Around Christmas time, one of my friends asked me if I'd make him some cushions to give as a present. Apparently his friend has a black leather couch, and that was the only requirement he gave me - the rest was up to me. I didn't have any material in my stash that I had enough of to make two cushions with, so I had to head off to find some.

I stumbled across a nice-looking fabric shop near Nick's house and decided to have a look one day. I was thinking of getting something white-ish for the cushions, and they had this really cool black and white square pattern in the shop. The material was some sort of cotton blend and it felt really nice to the touch. It was a tad pricey, but it was too nice to pass up.
Being the intelligent person I am, I went home, sat down to make the cushions, and realised that to make two cushions you have to buy four squares worth of material, not two like I'd just done. I thought the material would look nice with a plain white back so I headed off to another material store to find some heavy cotton. I discovered that a) thick plain cotton is actually really hard to find and b) white actually comes in many different shades and trying to find a white that matches another white you already have is almost impossible. Before I left for the shop Steph had been trying to convince me the cushions would look better with a black back, so I ended up leaving with a black synthetic type material - not ideal, but overall not bad.

Cushion covers aren't difficult to make. Aside from figuring out the closure for them (zippers, in my case), they're essentially just two big squares sewn together. I was having fun making them but wasn't particularly excited about seeing the result, until I actually pulled it out of the sewing machine and stuffed the cushion inside of it. This is what it looked like:


I don't know what happened, but all of a sudden I was in love with the thing. It was so soft and the print with the black backing was so nice and the material felt so good that I seriously just sat and hugged it for ten minutes. Whenever I sell something, I think I undervalue it a bit in terms of pricing. One of my friends once loved the pouch I made her so much that she insisted on giving me more money than I asked for it, and I was confused, but with the cushion I all of a sudden understood how you could pay a lot of money if you really loved something.

The idea of giving it away made me really sad, but thankfully I had Nick's shiny SLR camera on hand so I had a bit of a photo shoot with it.


It actually looked really good on my couch! If I can get my hands on some more of the material, I might be sneaky and make myself one. But until then, I hope its owner loves it as much as I do.

Tuesday, 27 December 2011

Fabric-A-Brac

About a month ago, one of my lovely friends sent me a link to a rather irresistible event. As anyone even remotely crafty will tell you, having a drawer/box/wardrobe/bedroom's worth of material built up is a pretty common problem. Enter the Fabric-a-Brac! Essentially a market for material stashes, it looked like a decent opportunity for sellers to offload some old supplies and for buyers to grab a bargain.

To be honest, I wasn't expecting much and I already had a lot planned for the day, so I figured I'd just pop in for half an hour. My expectations seemed to be reinforced by the plastic flags and coloured paper flowers adorning the entrance to the building. But when I actually arrived, all of that was rather pleasantly blown the window.

Photo by Angus Forbes
The suite it was held in was both big and packed. There were tables and tables full of fabric and accessories, and wherever there wasn't a table, there was a person. A lot of the people were about my age too, which was reassuring. It was actually somewhat intimidating! As I may have mentioned before, I'm more of a knitter than a seamstress, so all the fabric sent my head into a spin.


Luckily one of the first tables I found was full of wool, so I managed to calm down a bit with something familiar. If you haven't noticed yet, my favourite colour is purple. I've told and told and told myself that I won't buy any more purple clothes or wool, but I just couldn't help myself. There were balls of a maroon cashmere/silk blend for $4 a pop. Usually something like that would cost about $12 at my local wool store, so I went ahead and snapped it up. I have a vague idea to make a little lacy bolero with it, but I have to try and find a pattern for one!

Photo by Angus Forbes
Having armed myself with some wool, I decided to take on the fabric. Most of the fabric shopping I've done previously has been based on whatever brightly coloured print catches my eye, and I don't have much of a handle on what to look for when it comes to different fabric compositions - although I do know that somewhat thickish, quilting-weight cotton makes for nice pouches. Narrowing in on something good when you're faced with this much unfamiliar product is hard though!


After circling around the whole studio once or twice and still having no idea, I fell back to my normal shopping method. Usually when I want to buy something I'll find something I like, walk out of the store, and if it's still on my mind about it an hour later I figure I actually do like it and I'll go back and buy it. Yes, I am somewhat indecisive. After two goes around the studio, the only thing that I was still thinking about was a small strip of thick textured cotton in a nice retro bluish print. I couldn't remember exactly where it was, so I went round again until I found it. Strangely enough the stall owner had no idea how much to sell it to me for so we just came to some mutual agreement on pricing - I don't even remember how much it was now! The material will be up in the Oli-store soon if you'd like a pouch made out of it.


The last stop was a table that I had spotted that was selling patterns. I've never sewn up a piece of clothing before, and to be honest sewing patterns scare me. But I've been wanting to try it for a while. I really want to make myself a skirt out of some sort of spotty black and white material that's a decent length - mid-length skirts are a surprisingly difficult thing to find in shops at the moment! I started rummaging through the pattern box and lo and behold, there was a nice skirt pattern. Even better, both the packaging and the store owner told me that it was an easy one to follow, so I added it to the shopping bag. The owner also told me that the pattern would look nice with some sort of lace or trimming on it, and I should go find myself some.

Luckily in my confused wandering around the studio I'd spotted a trimmings stall. I managed to score myself some black lace which would go nicely with any spotty black and white skirt material.


I really wanted to go find myself some material for the skirt, but by this point my 30 minutes was up. I left the studio very very reluctantly, but with a bag full of goodies. Hopefully it'll be on again sometime soon, and I can find a friend to go with who knows what they're looking for so I'm not completely lost!

Tuesday, 18 October 2011

Taming the plastic beast


If you think protecting your sewing projects is a good idea, and ever feel so inclined to sew with thickish plastic sheeting, here are some useful tips I have discovered. Hopefully you this way you don't have to learn them the hard, painful way like I did!
  • It gets deformed when you iron it. This probably common sense but I just didn't think of it - I tried to iron the first piece I cut out and it became terribly wrinkly and crumpled and almost impossible to sew. If you really need to iron it, put the heat down to the minimum and put some material between your iron and the plastic.
  • It's weirdly sticky. I tried to sew with it, and my presser foot just wouldn't let the material feed through like it normally does. I was freaking out thinking that was something wrong with my sewing machine and it took me a while to realise that the PVC was sticking to the shiny casing of my machine and hanging on for dear life. Try your best to make sure there's material between the plastic and any part of your machine, especially the foot.
  • It's terribly unforgiving. While it may not look it, a sewing machine's needle is actually quite wide. Once you sew through the plastic once, if you unpick it you won't be able to reuse that part of the plastic as it will have a lovely row of holes punched in it.
  • It builds up a lot of static electricity. This one sounds odd, but it means that dust and dirt will stick to it like glue. You need to make sure to wipe it down before you use it.
  • It's inflexible, and it gets stiffer with time. I had it folded up like the rest of my material swatches and just couldn't use the last of it as it had been folded up for too long and was overly crinkly. Try and get it rolled up for you when you take it home.

The joys of PVC

I've had a lot of fun over the last couple of days drawing logos and printing labels, but tonight I fought a terrible battle against some PVC - just one new fight in a long struggle that basically has me losing against a sadistic plastic enemy.

My zipper pouches - can you spot the shiny enemy?
First, some background - one of my favourite things to make are little zipper pouches in bright prints that you can use for pretty much anything (I currently employ one as a makeup case, one as my camera case and keep one for jewellery when travelling). I realised fairly early on that I could make them spill-proof by sewing a plastic outer layer onto them, so I tottered off to my craft store to see what I could find. They had some awesome PVC sheets - the type your grandparents keep on their dining table to protect the tablecloth - so I brought some home. 

It took a lot of effort the first night. There were lots of things I didn't realise the PVC would do and lots of different ways I didn't realise it would react to my machine (like stick to it!). But after some fighting I finally figured out the best way of sewing it into the pouches. While they're more difficult to make than the non-plastic coated ones, they look lovely and really are spill-proof. And when I went back to buy a second batch the sales lady was extremely helpful and put it on a big roll for me so I could store it without it getting crinkled. Not the easiest thing to carry home, but effective none the less. So I thought I had won the war - until tonight.


The dreaded PVC roll
My state of mind after fighting with it all night

My friend asked me to make a pouch with the plastic on the inside, to protect against any makeup that might spill from within. Innocently enough, I said yes, thinking it couldn't be much worse than the normal ones, and went to work. I'm not very quick at making them yet - usually one will take me half an hour or so - but I ended up working on this for close to two and a half hours all up.

It just wouldn't work! Seeing as the plastic was getting pushed inside the pouch instead of just sitting outside like usual, trying to line up the amount of slack in the plastic versus the amount of give in the material was a nightmare. Also, the lining starts off as being inside-out and gets flipped around, and all the pushing and pulling put a bit too much strain on the plastic and it split slightly. Needing to fix the hole, coupled with the fact that the PVC just refuses to go through my machine when I try to sew it without any material between it and the needle, meant I had to finish the bag off by hand. Being more of a knitter than a sewer my stitching is somewhat wonky. Luckily it was just for the inside! I was also lucky in that I had some really sharp hand needles that pierced the plastic fairly easily. My fingers are still feeling rather sore and well-pricked though.

I actually really like the final product. It's very durable-feeling, and it won't get dirty on the inside (which my makeup case is starting to do). I sort of want one for myself now but the idea of making another one is sending my brain into a spin, so it may just have to forever remain as a painful but successful one-of a kind experiment.


The finished product
The pretty, evil interior


If you want to make your own plastic pieces and I haven't scared you off it entirely, hang around for the next post and I'll write up some tips for trying to work with it.