Showing posts with label intermediate. Show all posts

Sunday, 20 August 2017

Tutorial: Afterthought thumbs

When I learned to make mittens, the tutorial I found involved creating a thumb without a thumb gusset. I didn't know this at the time but it turns out this is called an afterthought thumb - probably because you do minimal work to set up for it! I love afterthought thumbs. They're a great way to get in to mitten or glove knitting.

This tutorial assumes you're following a pattern (like my Starry Starry Mitts) that use an afterthought thumb. It'll have details in it on how many stitches to knit on scrap yarn and how far into the palm you need to start the thumb stitches.

First off, as you're knitting the main part of the glove, you'll set up a hole that you'll knit the thumb into later. The pattern will say something like this: knit 8 stitches with scrap yarn, transfer stitches back to the left hand needle, then knit stitches with main yarn. Let's break this down step by step.

You'll need some scrap yarn. If you can, use a slippery yarn like cotton to avoid it felting with your main yarn. It also helps to use a colour that's very different to your main yarn so you can see it more easily later.

When you get to the thumb stitches, join your scrap yarn to your project and knit the indicated number of stitches with it.
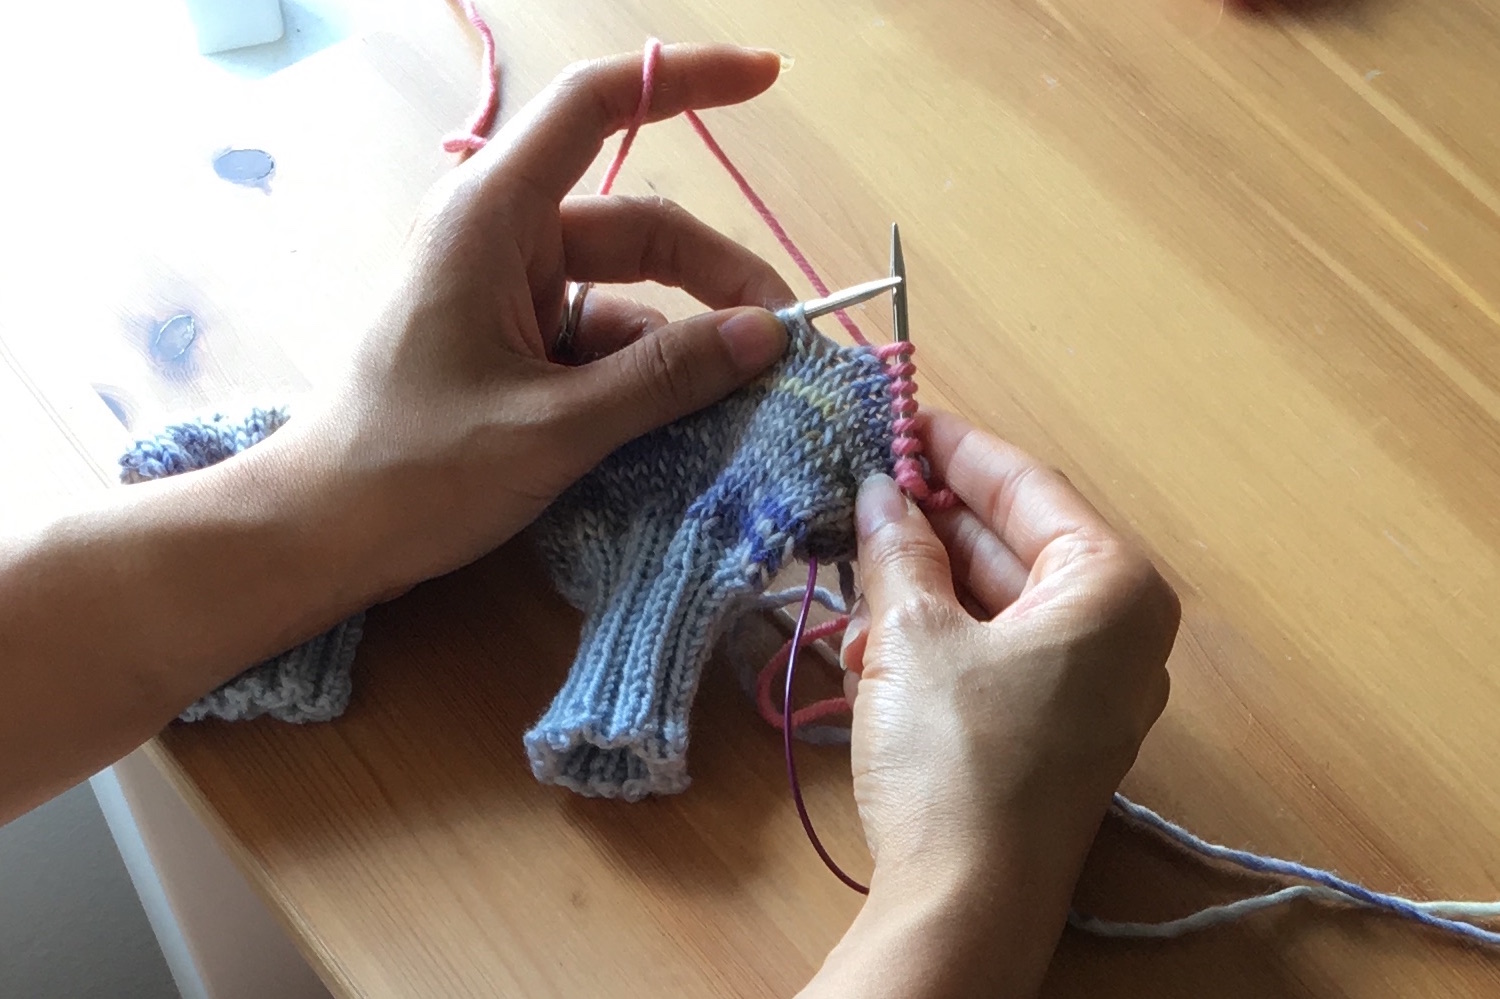


Then, slip those stitches knitwise from the right hand needle back onto the left hand needle.
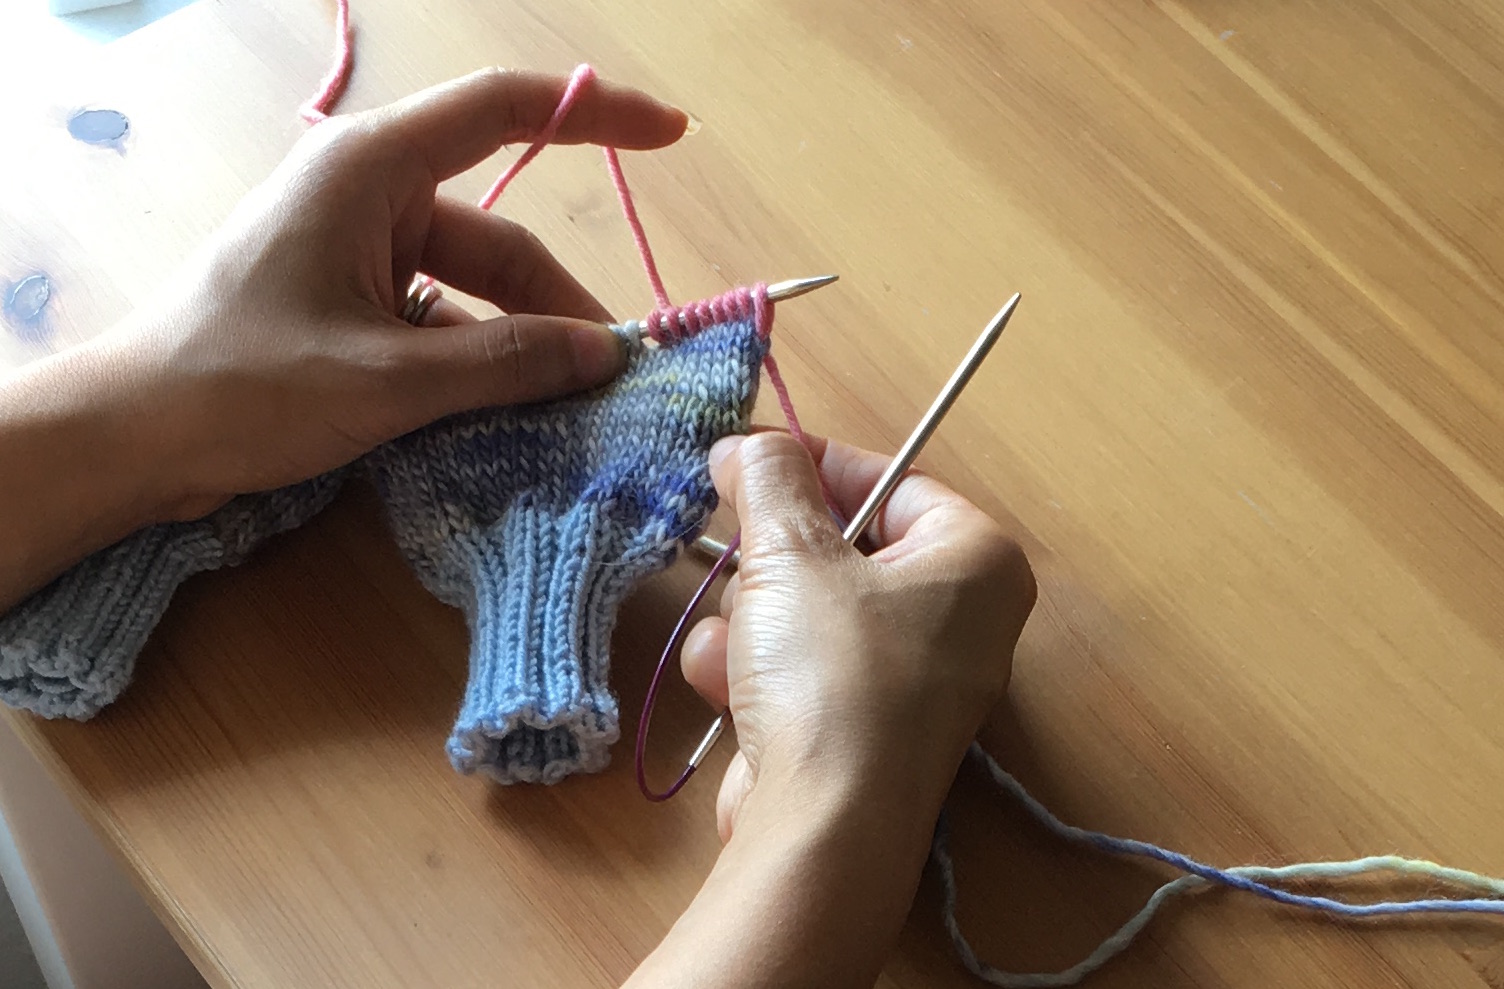


Leave a couple of centimetres for a tail and cut the scrap yarn. I also like to tie the two ends of the scrap yarn together.


Now, pick up your regular yarn and knit all the scrap yarn stitches.
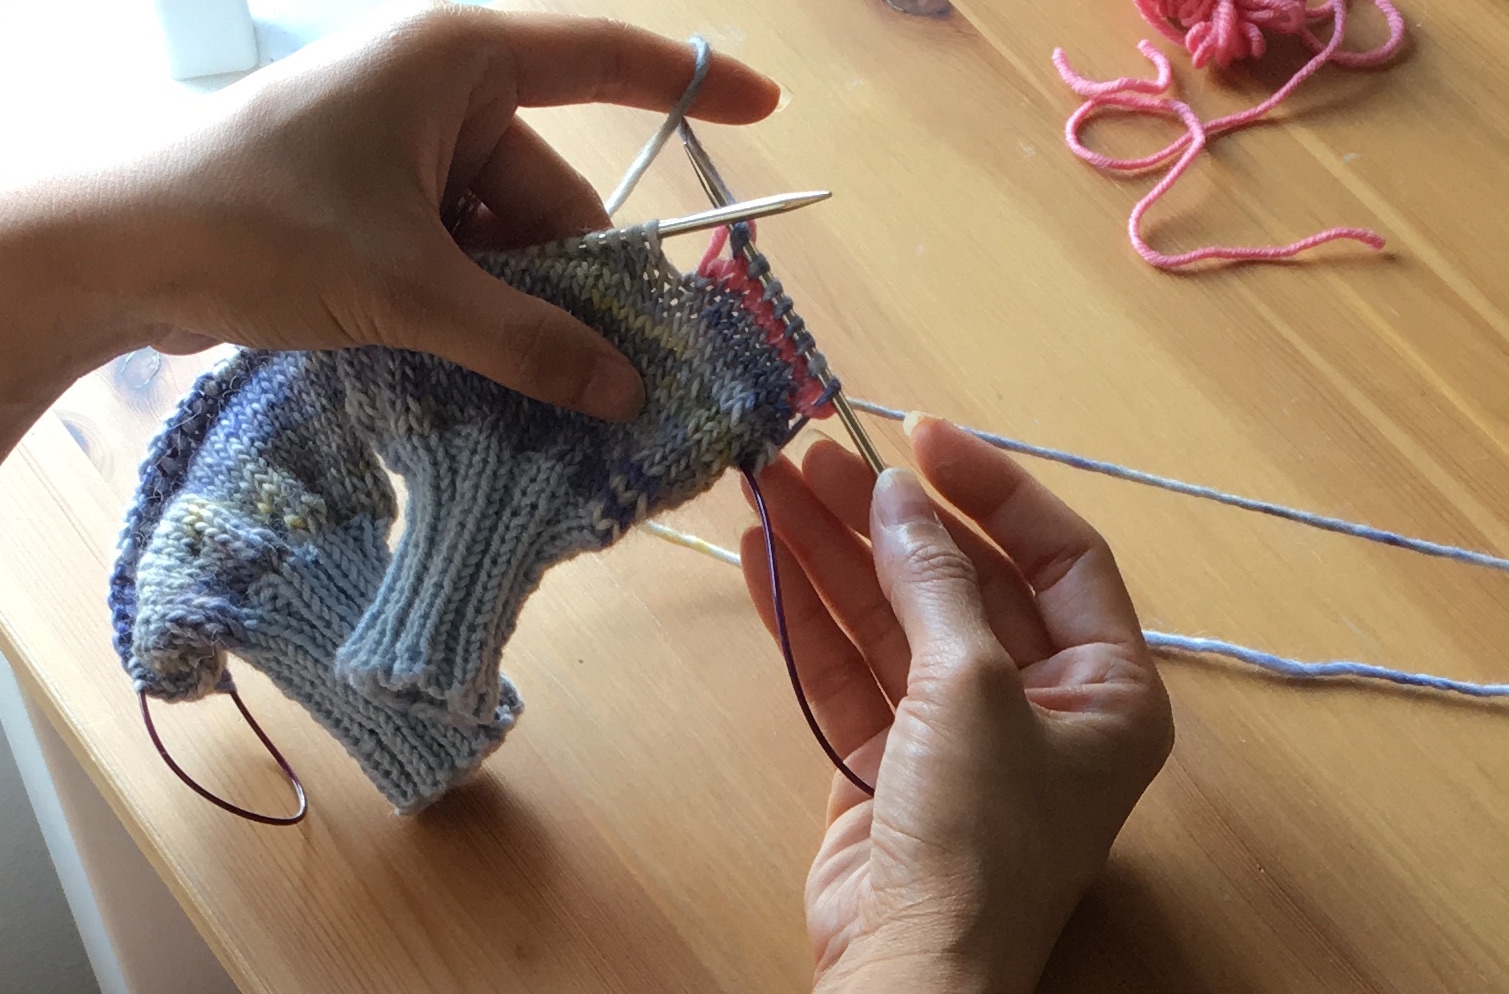


That's it! Leave the knotted ends hanging on the inside of the mittens, and finish the rest of the mitten hands.

When the main part is done, your pattern will tell you to pick up the stitches around the thumb hole. Use a long cable needle for the magic loop method or DPNs.

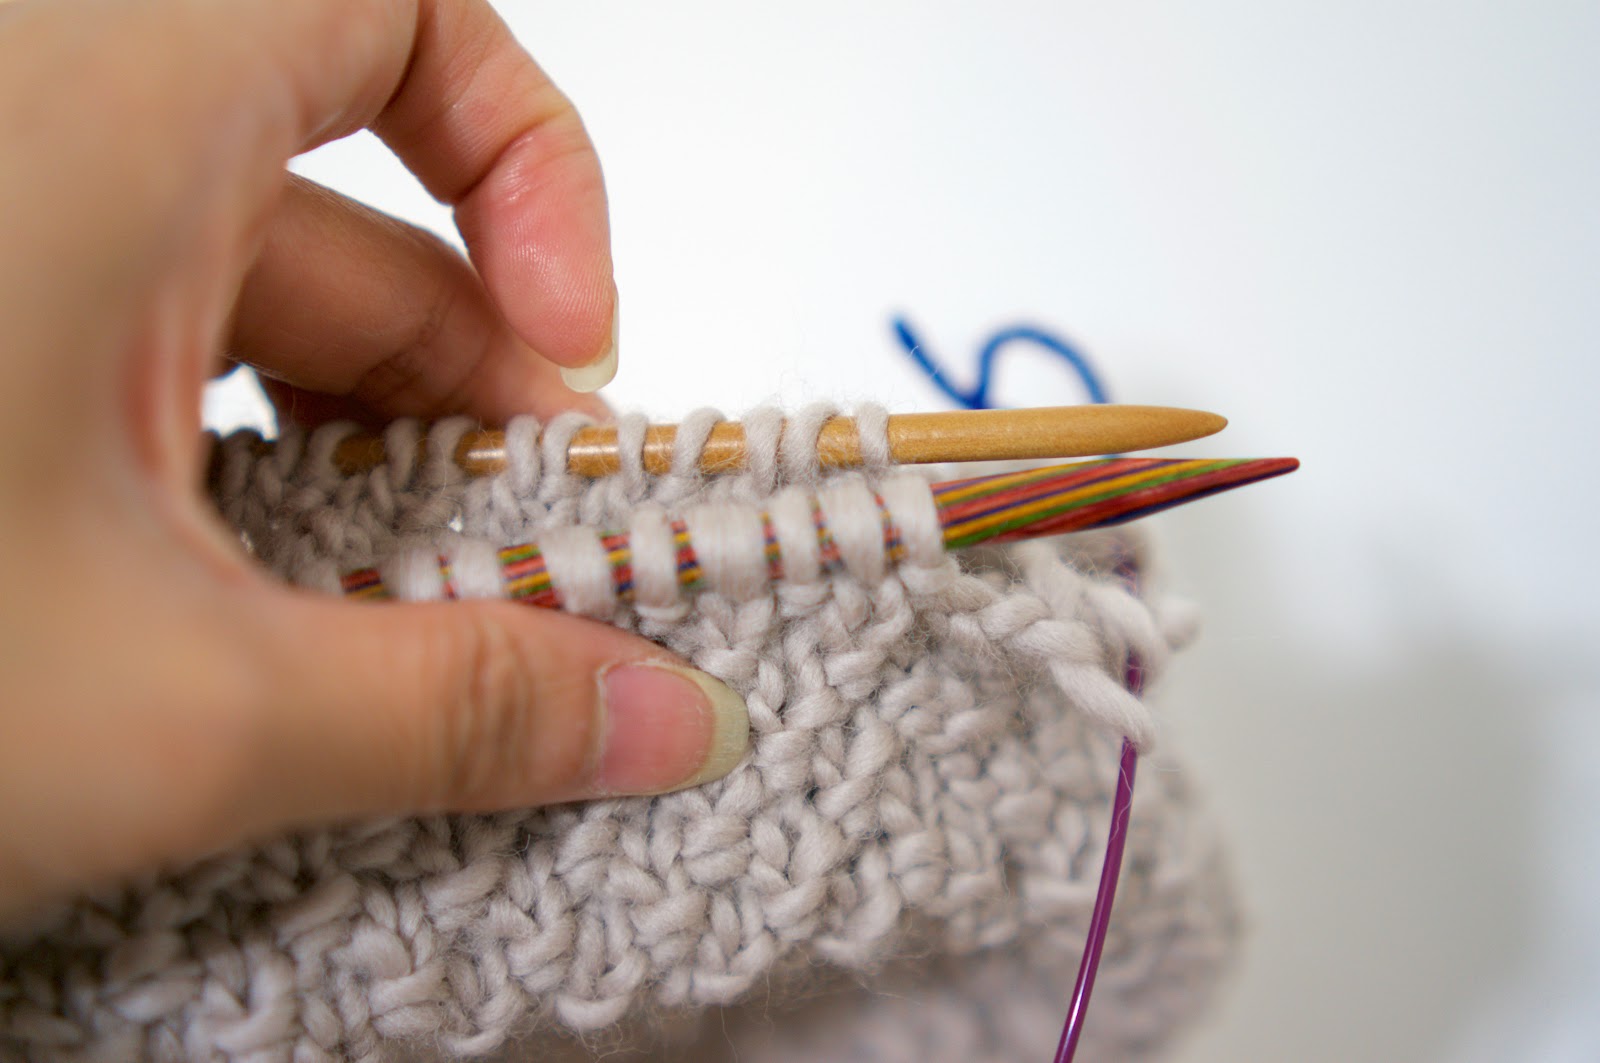
Take your needle and insert it into the left leg of each of the stitches in the row directly above the scrap yarn section, working from right to left. You should have the same number of stitches on your needle as the number of stitches you knit with the scrap yarn.


Then, if you're using a long circular, pull it so the stitches you just picked up are on the cable and your needle is free of the stitches. If you're using DPNs, just pick up another DPN.

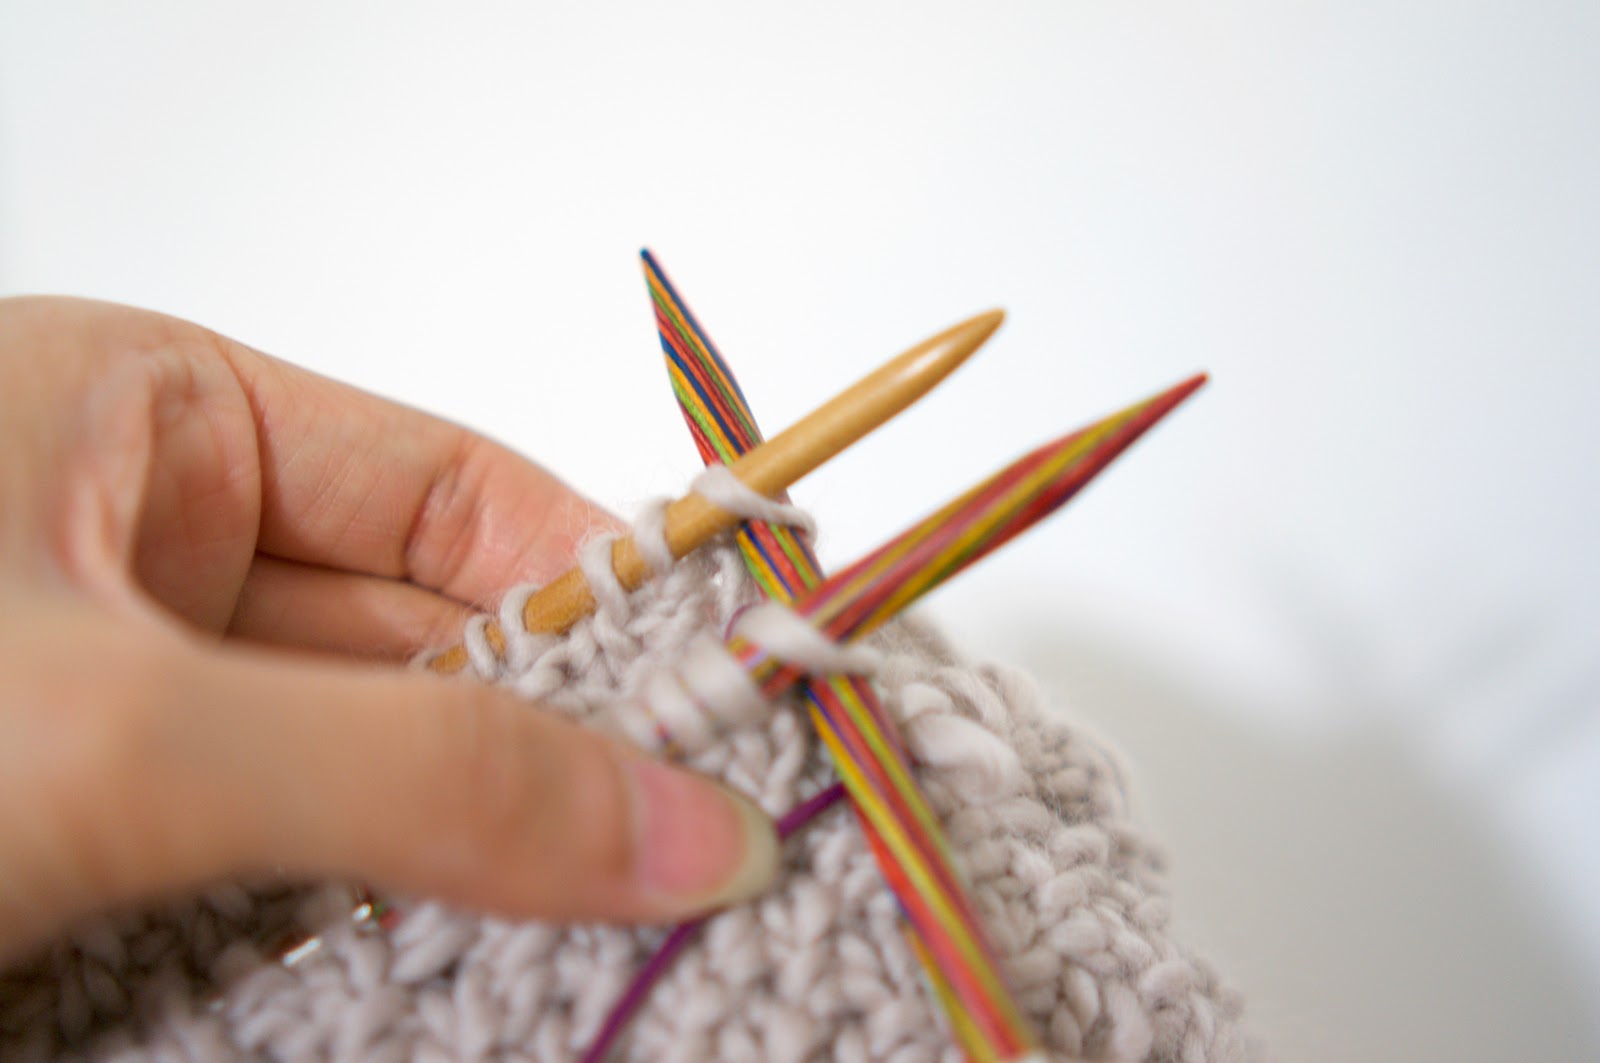
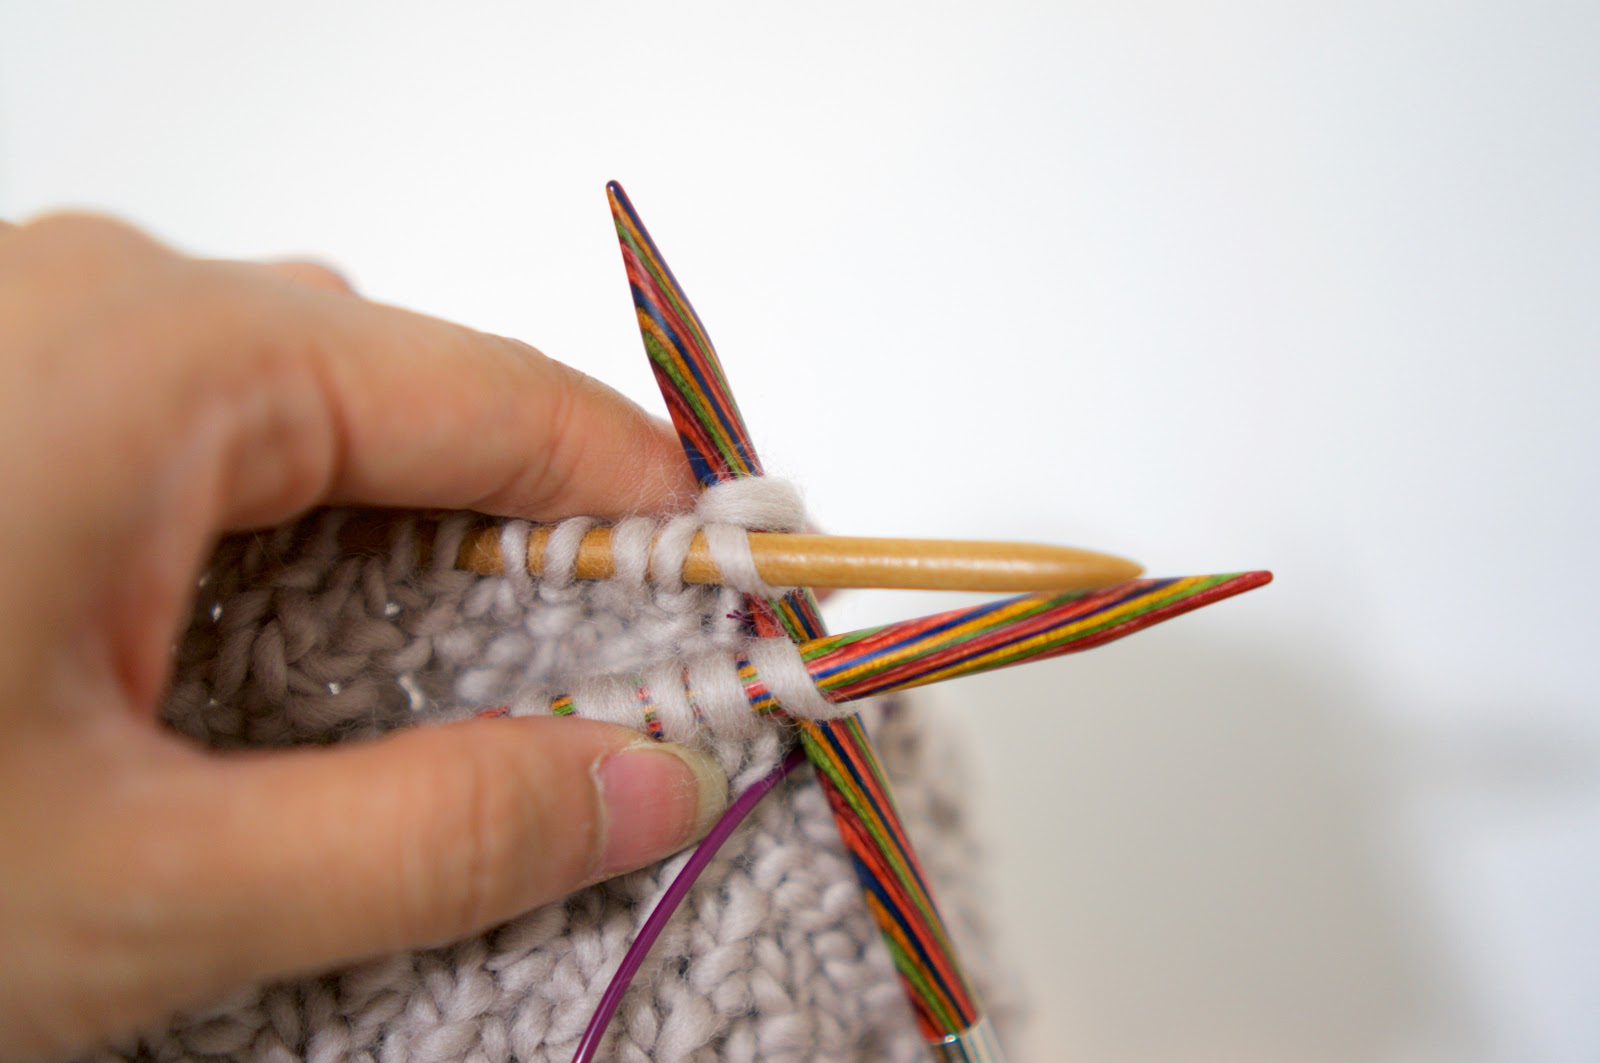
Turn your work upside down and using the needle, pick up the right leg of each of the stitches in the row directly above the scrap yarn section. Again, you should have the same number of stitches on your needle as the number of stitches you knit with scrap yarn.
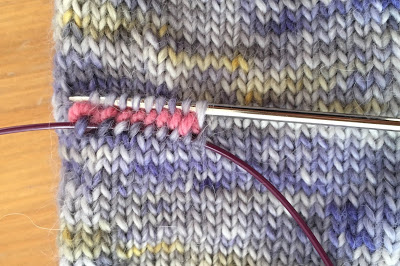


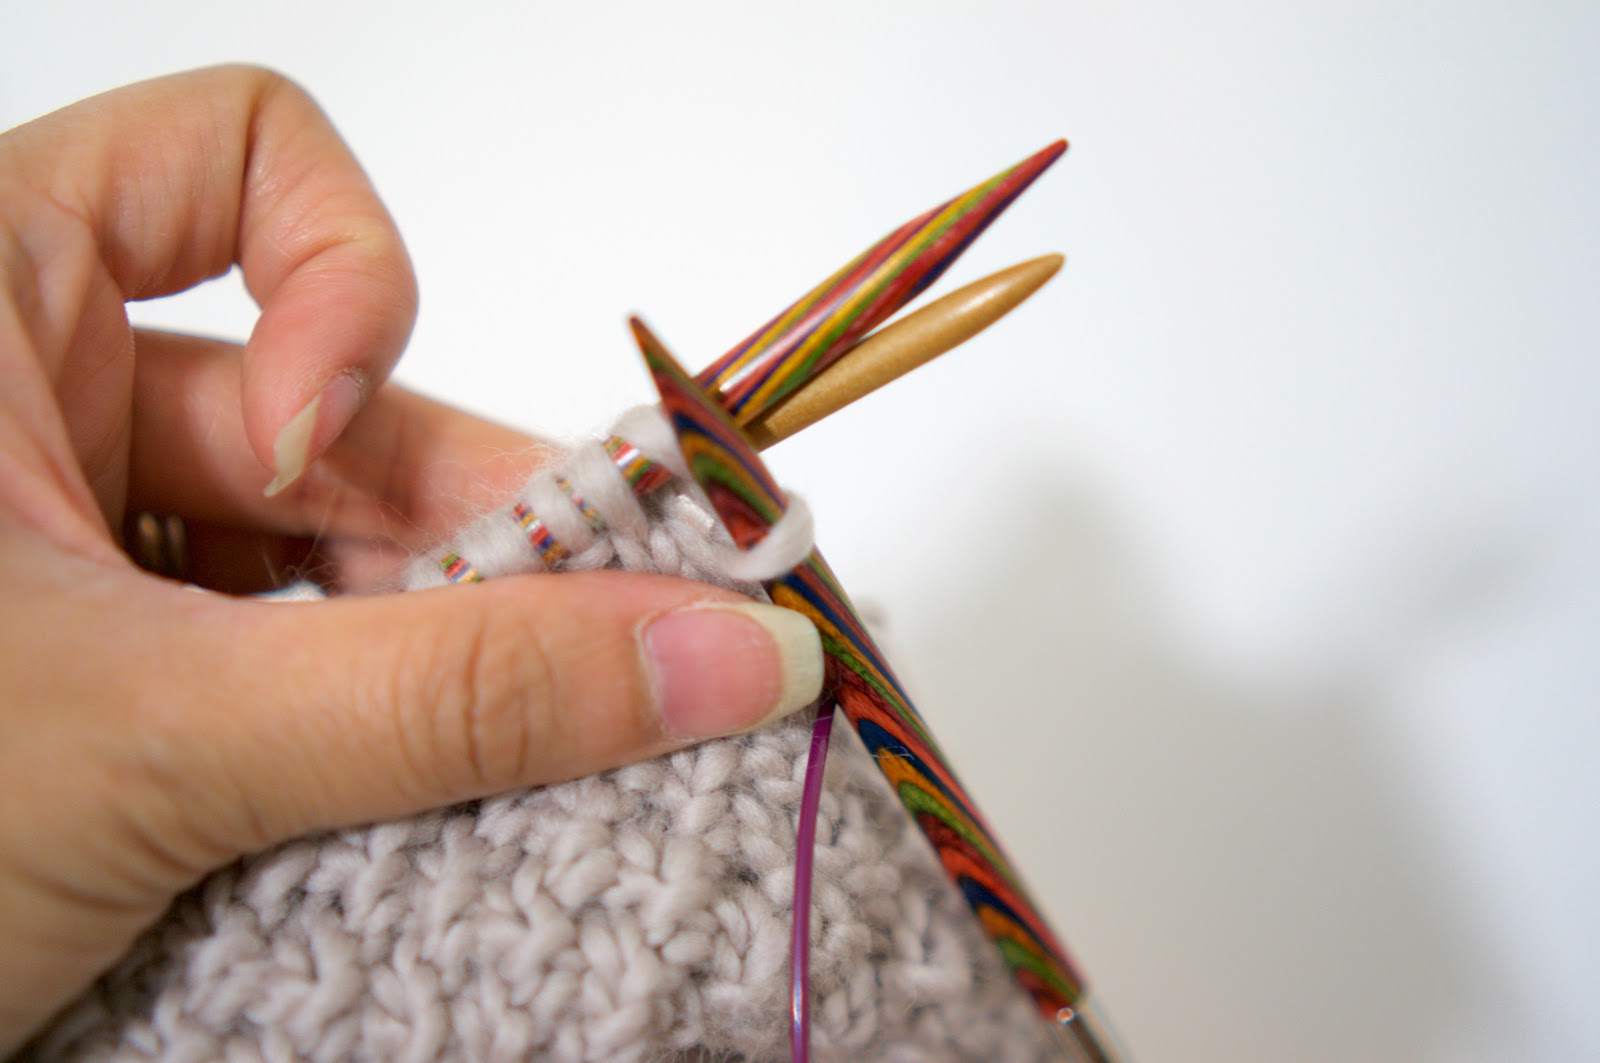
Now turn your work back the right way up and reach in to the glove to grab the knot you made in the scrap yarn ends. Cut it off. Then use a spare needle to unpick the scrap yarn stitches.


At this point, you have a hole for your thumb, and your stitches arranged on your needles ready to be knit.


Join your main yarn back onto the project and follow your pattern to knit the thumb.

When your thumb is finished, you may notice some small holes in the corners of the thumb. You haven't done anything wrong - it's just unavoidable with afterthought thumbs. When you're weaving in your ends, use the yarn tails to sew the holes shut.

One tip: To avoid these holes I like to pick up an extra stitch on the outer edge of each row I pick up. So if the pattern said to knit 8 scrap yarn stitches, when I pick the stitches up I'll pick up the stitch to the left and right of the 8 for a total of 10. Some patterns will tell you to do this, but some don't. If you do this but the pattern doesn't say to do it, make sure to decrease the extra stitches you created in the first or second round of the thumb.

If you'd like to try an afterthought thumb out, check out my Starry Starry Mitts pattern!

Sunday, 21 May 2017

Tutorial: Double brim beanies


Double brim beanies are lovely! Until I discovered them, I felt like all of the brims on beanies needed to be made up of ribbing. With double brims, though, you can use any stitch you want without the ends curling up, and they create a nice thick fabric so they stay snug even without being ribbed. 


To begin a double brim beanie, decide on your stitch pattern, how many sts you’ll need and how long you want the brim to be.

Cast on in the round using a circular needle and a provisional cast on, mark the first st of the CO with a removable marker, and work the brim until it’s as long as you’d like it to be. Then work a row of purl sts. These are are optional, but they help keep the bottom edge of the brim neat. Work the same number of rows as you did before the purl row.

Place the a quarter of the sts of the provisional cast on to a spare DPN. Remove the stitch marker and any waste yarn used for the provisional cast on from these sts.

Fold the brim along the row of purl sts so the sts on the DPN are on the inside of the round, behind the live sts. Line them up so the first stitch on the DPN is behind the first st of the round.


You will now knit the first stitches on both needles together.


Step 1. Insert the right needle of your circular needles into the first stitch on the front needle, then into the first stitch on the DPN.


Step 2. Wrap the yarn around the right needle as if to knit.


Step 3. Pull the yarn forward through both stitches.


Step 4. Drop the first stitch off both left hand needles. You have completed one stitch.


Repeat steps 1-4 for the remaining pairs of stitches.

Place the next batch of stitches of the provisional cast on onto the DPN, and repeat the process. Continue until all stitches have been knit together. Before knitting the last few sts closed, make sure the tail of your CO is tucked into the inside of the double brim - no need to weave it in to your work.

And you’re done! Now knit the body of the hat however you like, and you’ll have a beautiful snug double brim beanie.

Wednesday, 16 November 2016

The Basketseed Cowl

I have a soft spot for basketweave. When my mother realised that someone had taught me how to knit, she took pity on me and taught me how to purl. After I tried it for a while I realised that the knit and the purl sides of my knitting looked different, and I figured out how to do a somewhat modified basketweave stitch for myself. The first pattern I ever designed was a basketweave scarf.

Unfortunately the edges tend to curl up, but I've been wanting to try a chunky knit cowl pattern recently and knitting in the round seemed like the perfect solution to the problem of the edges curling. I've been playing with seed stitch a lot too recently and couldn't resist throwing some in, so the Basketseed cowl was born!


Click through for the pattern, or if you're pressed for time you can buy the finished product on Etsy!


Saturday, 23 July 2016

The Slouchy Mushroom Beanie

I love slouchy beanies. They make the perfect winter accessory - they keep you nice and warm, but they're still really stylish. I'm teaching a workshop on how to knit in the round soon, and I wanted to use beanie pattern that wasn't too complicated - just knit, purl, and some basic increases and decreases. After a bit of an internet search proved fruitless, I decided to just write my own.

I still had a ball of We Are Knitters yarn left over from my seed stitch scarves, so I decided to make a beanie that would match the scarf. This pattern doesn't use a whole ball - if you go buy yourself three balls and make the hat first, you can use the left overs to make your scarf a little longer.


Thursday, 23 June 2016

Knitting stitch pattern: Honeycomb stitch


This hexagon stitch is a great first pattern for beginners who know how to knit and purl and want to start working with multiple colours. It's surprisingly easy to do but looks really impressive - a win-win situation if there ever was one!